

How to Create a Catalog In Five Easy Steps
If you have a wholesale business, a catalog is almost essential. In fact, let us strike almost from the previous sentence. Most wholesalers are aware that a well-designed catalog is one of the most effective measures you can take to promote your brand. However, a catalog is also a great tool for retailers too. And it’s not anywhere near as expensive or labor intensive as you think. An attractive catalog will truly add value to your brand.

What used to be an expensive and time consuming process has now become incredibly simple. Previously, it was necessary to go through an arduous design and production process. An excellent article on wikiHow explains how to do this. The good news is that most of this work has now been automated. ZINation Catalog Maker enables absolutely anyone to create a stunning catalog, with no design experience or skills necessary. To learn how to create a catalog in just five easy steps, read on.
Step1: How to create a winning catalog for your Shopify or Magento store.
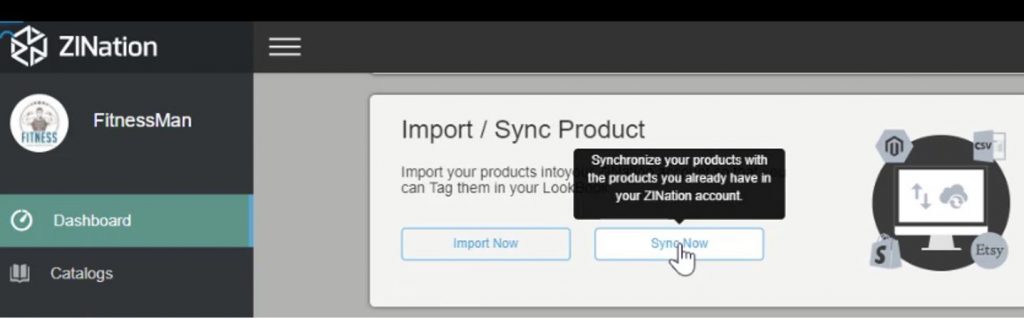
The first step is to synchronize your products from your store, to ensure that any changes that you have made to your products carry over to your current and future catalogs. From your dashboard, scroll down to Import / Sync Product and click Sync Now. This will open a pop-up. You can choose to sync by products or collections.
Step 2: How to create a catalog automatically.
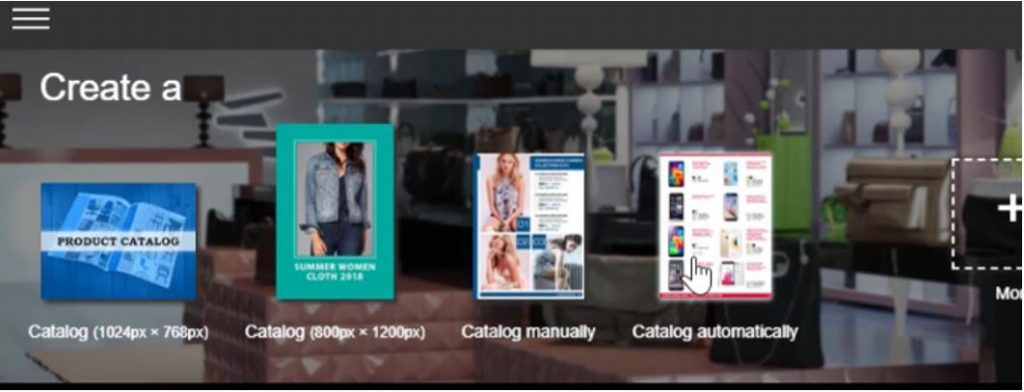
Click on Catalogs, which is directly beneath Dashboard. Then click on Catalog automatically. This will open a page which displays all of your collections.
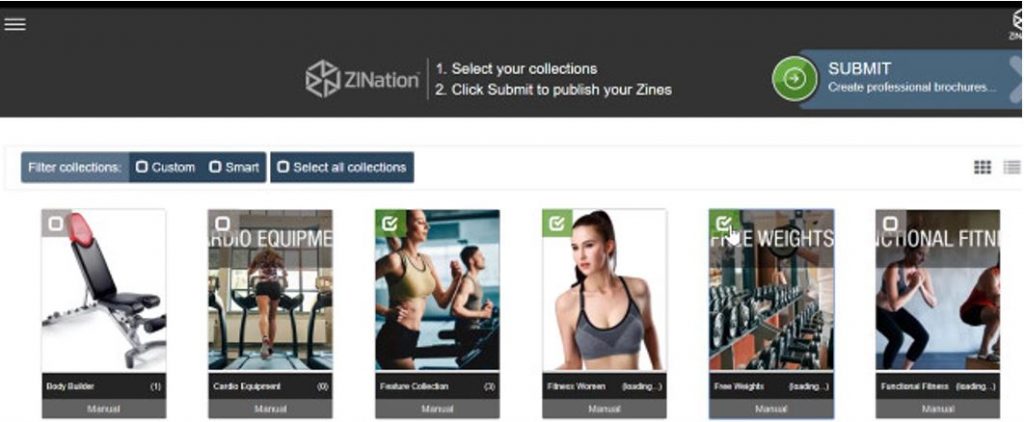
Step 3: How to select the collections that you wish to include in your catalog.
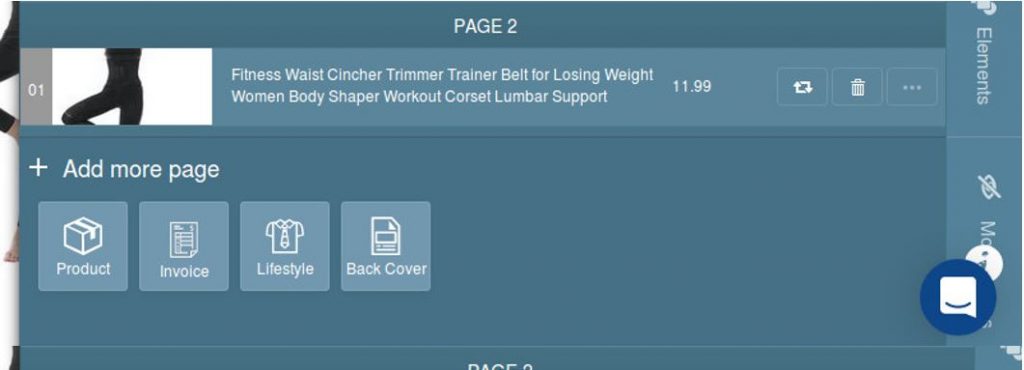
If you want to include a collection in your catalog, simply click on it. You can include any of your collections, or all of them. Clicking on a collection toggles the check mark, which shows whether it is selected or not. Then click Submit.
The Create Zine pop-up will appear. Enter the Zine Name, which will be shown on the front of your catalog. If you selected more than one collection for your catalog, you can choose the order in which they are displayed. You will see a heading which says Organize – drag and drop to re-organize the collections. It is self-explanatory. Your collections are shown below this heading in a scrollable frame. Click on a collection, and move it up or down as desired. You can then choose how to sort the products (the default is to auto-order from your store). The final action is to select a theme for your catalog. You will see a heading which says Select Design (theme filter) *. Directly below this is a scrollable frame displaying the default themes. Scroll down until you see a theme that is suitable for you, and click to highlight that theme. Click Create.
After your catalog is created, you will be taken to ZINation Studio. You now have a complete catalog, and if you are happy with it, you can stop here. However, if you wish to make modifications to further enhance your brand, you can do so easily (we suggest that you should at least change the front cover and add a back cover, because it makes your catalog much more attractive, and therefore much more effective).
Step 4: How to change the front cover page.
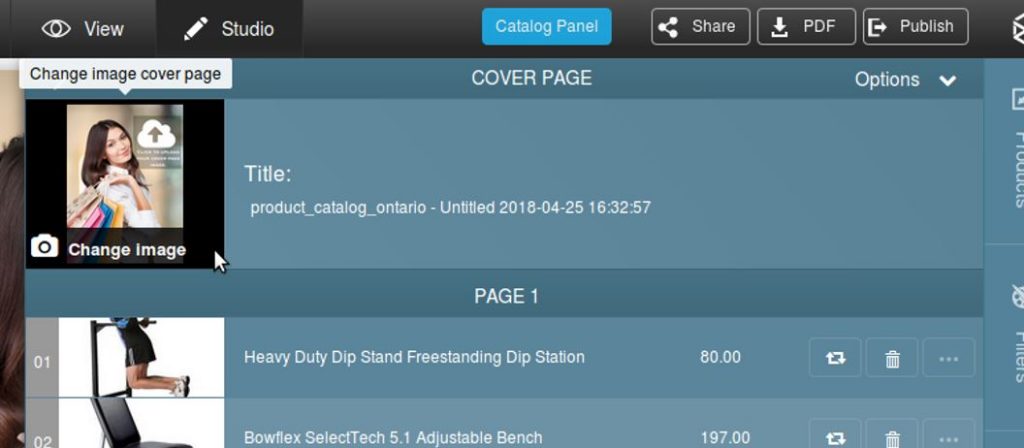
Your new catalog will already be open in ZINation Studio, and the front cover page will be selected by default. The right hand sidebar will also be opened by default. You will probably want to upload a new image (depending on the theme you selected, the default image is either the theme image or the image from the first product in your catalog), and edit the text fields. To upload a new image, go to the sidebar, click on the camera icon on the thumbnail of your cover page image, and upload an image. Similarly, to change the text in the title, hover over the text below Title, click, enter the new text in the pop-up, and click Save. Note: you can also do either of these tasks from the page itself, without using the sidebar. When you select any element on a page, the interface adapts to present you with the controls you need. It is user-friendly and intuitive. Feel free to play!
Step.5: How to add a back cover page to your catalog.
To add a back cover page, open the right sidebar and scroll down. You will see a Back Cover icon. Click on the icon, and the sidebar will change. The first thing that you have to do is select a layout. By default, the lifestyle layouts are highlighted. Choose a layout that appeals to you, click on it, and a back cover will be created for you using that layout. On the left of your screen, select your new back cover page, so that you can edit it using the WYSIWYG editor. To change an image, click on it. A slider will drop down from the menu bar at the top of your screen. Click on the Change Image icon, and the right sidebar will open, allowing you to upload a new image and enter the title.
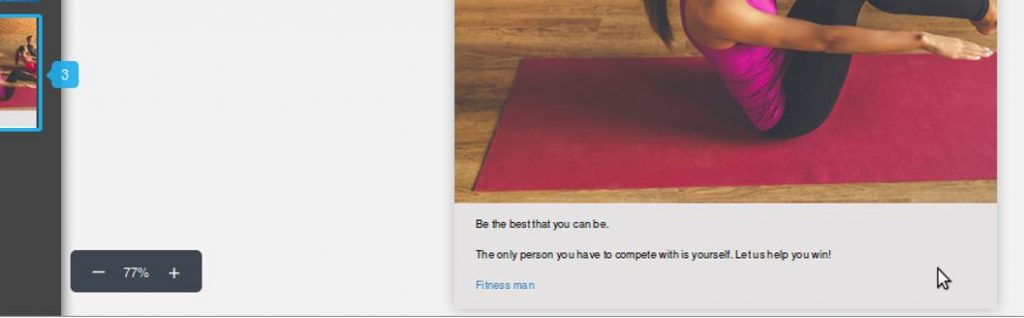
Depending on the layout you selected, you may also be able to enter text. Click on the default text field, and enter your new text. In the example above, a link has also been added to the store.

If you have followed the simple steps above, you should now have a catalog with front and back cover pages. The image below shows the pages from a simple catalog with just two product pages. It took just two minutes to create using the steps outlined above. You can download this catalog in pdf format by clicking this link, but please note that because it is only a demo store, and hasn’t been activated, the links to the store itself are not working.
In just five easy steps, you can make a beautiful catalog to showcase your products. It’s a great way to show your customers your latest products, promotions, or seasonal offers. But there’s more than this to Catalog Maker. It isn’t just about products. It’s about developing and promoting brands. At ZINation, we are very aware that our success depends on your success. Catalog Maker has therefore been purposefully designed to enable our users to add their own custom content, such as company history pages, specialized information pages, and more.
Step.6:How to customize your catalog – adding, deleting, and moving pages.
You can make your catalog truly your own. From within your ZINation studio, so many options are available to you. You can add, move, and delete pages, and changing layouts is simplicity itself. These layouts can be applied to your whole catalog, or to individual pages on a page by page basis. Catalog Maker’s rich features give you total control over your catalog’s appearance.
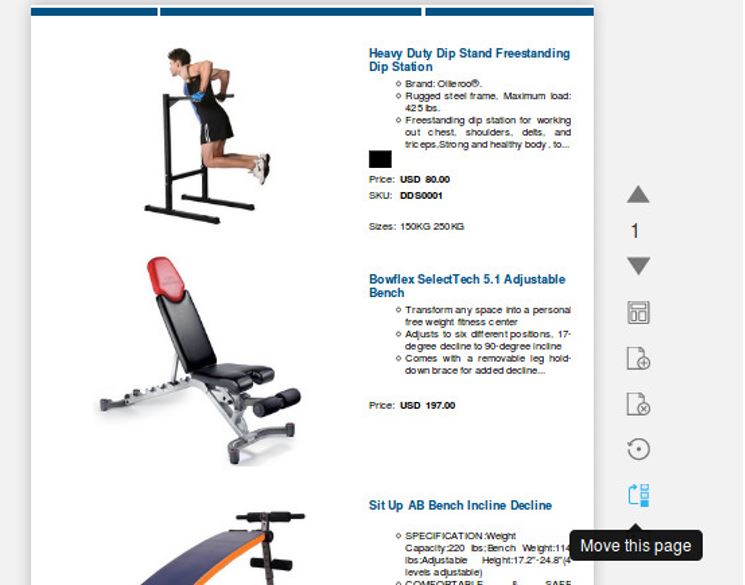
Whenever you click on a page, you will see icons to the right of the page. These icons enable you to navigate between pages, add pages, delete pages, change the page order, reset the page, or move it. All within the catalog itself. Catalog Maker is not just a one-size-fits-all app. Your finished catalog will not look like a production line clone. Not only is there an extensive range of templates to choose from, you can customize the templates to suit your needs and stand out from your competitors. You can add images and modify them (there is no need for expensive software such as Photoshop – you can change, resize, and crop images from within Catalog Maker), insert information pages, and vary each of your catalogs to meet your specific requirements as the need arises.
With Catalog Maker, a beautiful, well-designed catalog can be yours within minutes. And Catalog Maker offers yet another bonus. All of the content within your catalog is shoppable content. It is not necessary to spend hours designing an order form. Why would you do so anyway? If a customer has to navigate away from your products in order to fill in a form or confirm a decision on a shopping cart, this is a barrier between that customer browsing and buying. Catalog Maker removes this obstacle. Clicking on “BUY NOW” seamlessly adds the product to the customer’s cart, all within the catalog itself. All in all, Catalog Maker saves so much time. The entire process is automated, with support available at every stage. There is no need to hire technical experts to design the catalog, no need to create mock-ups, and absolutely no need to print hard-copy sales material. It really is the best app out there.
However, the title of this article was “How to Create a Catalog in Five Easy Steps,” and that’s what we have done. In the next article, we will explain how to modify your catalog, and add custom layouts. We kind of cheated with step six!
We hope that you have found this article useful and informative. As always, we would like to hear from you. Without your help and feedback, we can’t continue to improve Catalog Maker, so please don’t hesitate to contact us.
Thank you for reading.


ជួយអោយអាជីវកម្មកាន់តែជោគជ័យ?")


")
 ជួយអាជីវកម្មកាន់តែឆ្លាតវៃ")

